Lammps is a molecular dynamics simulation software intended for performing material science simulation. Its installation and running process can be confusing for starters, specially for windows users as it has to be run through a command prompt which most of us arent familiar with. Here, I am trying to give a simple outline of how to install and run the Lammps software.
Download & Install Lammps
For starters, Windows pre-built executable is the best option for launching Lammps. You can find it in the following link:
Here is a screenshot of the webpage:
As you can see, there are basically two types of file: One is Lammps with python wrapper, and another is without the Python wrapper. Also, for each of the cases, there is noemal exe file and MPI exe file. Lammps can be integrated with python, but we are not interested in it right now. Again, for large simulation, we may need multiple processor version ( MPI exe), but we will be limited to single processor in this blog for now. So, we will choose any exe version withon any name of python or MPI in it. It is to be mentioned that, all the previous version of the Lammps software are listed in this web page, so that you can choose any version that supports your computer architecture.
After downloading the selected file, install it. I highly recommend to install it in the default folder it is showing ( Usually your c drive), this will eliminate a lot of hassle.
Running your first Lammps code
Lammps is needed to be run with your command prompt if you are using windows. For running your first code, you will need an input text file where Lammps code is written. If you are familiar with python programming, you already know that python can be run via command prompt with a text file, Lammps is exactly similar to this.
As at this point we have zero knowledge about Lammps coding, we will need a pre-built text file. Fortunately, with the installation of Lammps, some example codes also come along. Firstly find the folder where Lammps has been installed. It should look like this:
In the example folder, you will find multiple examples. Lets go to the crack folder, it basically is an example code for crack propagation . It should look like this:
Here you can see a file named in.crack.lmp. It is basically a text file containing Lammps code. The common practice of naming any input text file is to in.file_name.lmp. So, copy this file.
Now, definitely you won't want your simulated data to be stored in the C drive. So, go to any folder, and create a subfolder for storing your result. Suppose, you saved your subfolder in your E drive naming it as "Lammps". Paste the copied file there. So it should look like this:
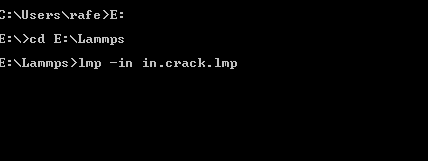
Thats it, we are all set to run our first Lammps code. Open command prompt ( by typing cmd in the start menu and hitting enter). A blackbox should appear. We will go to our E drive first, and then we will change directory to Lammps (our created folder). So,
Type E: and then hit enter.
Type cd E:\Lammps and then hit enter.
You should have the following scenario:
All right, now we can run our first code. To run any lammps code we have to write the command lmp, again the input command of lammps is -in. After that we have to write the name of the file. So our command will look like this:
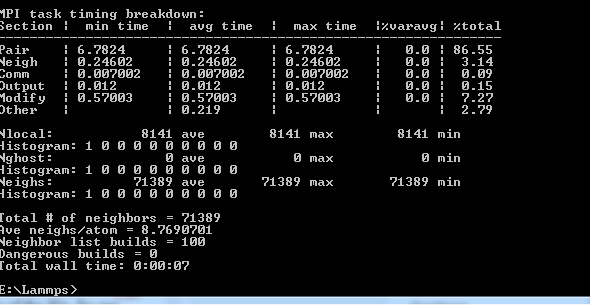
Then ,hit enter, and boom! Your code is run and will look like this:
If you just go to your Lammps folder, you will find a log file, you wil need this for post processing.
Congrats! You have successfully run your first Lammps programme.


Comments
Post a Comment